Importing bin locations from Veeqo
Export your bin and rack locations from Veeqo and get them onto your Shopify products so Pickscan's pick list groups items by warehouse location.
Why you need this
Pickscan reads each product's warehouse bin from a Shopify metafield called my_fields.bin_location. When that metafield is set, printed pick lists and the picking screen group items by location so your team can work through the warehouse in one pass instead of walking back and forth.
If you keep your bin and rack locations in Veeqo, those locations are not automatically synced to Shopify — you need to export them from Veeqo and get them onto the matching Shopify products. This guide walks through both steps.
Products without a bin location still appear in the picking queue and on pick lists, but they are grouped under UNSPECIFIED and the location sorting does nothing for them.
For more on how Pickscan uses bin locations, see Setting up bin locations.
Step 1 — Export your bins from Veeqo
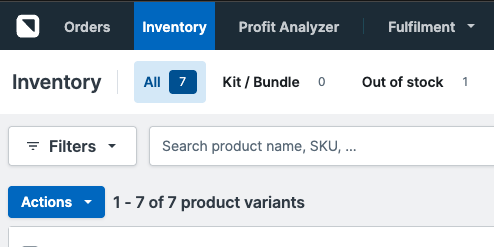
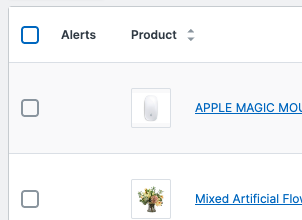
- Open the Inventory page in Veeqo
Go to Inventory in your Veeqo account. Each variant shows its bin against a warehouse location.
- Select the items to export
Tick the variants you want to export, or use the Select All checkbox to select everything.
- Open the export dialog
Select Actions → Export CSV. The Export variants dialog opens.
- Choose a single location for the stock levels
In the Export variants dialog, find Stock levels — "Choose which location stock levels to export" and change the dropdown from All locations to your specific warehouse. This is the step that adds the bin column. If you leave it on "All locations", Veeqo will not include your bin data. Then click Export and download the file.
- Check the file
Open the CSV and confirm you can see a
sku_codecolumn and alocationcolumn. Thelocationcolumn contains your bin/rack codes. If that column is missing, the export was run on "All locations" — open the export dialog again and choose a single warehouse location under Stock levels.
For more detail on Veeqo's CSV export, see Importing and exporting products by CSV and Bin location overview in the Veeqo help centre.
Step 2 — Import the bins into your Shopify products
The Veeqo CSV cannot be imported into Shopify as-is. Veeqo exports rows keyed by SKU with a location column, but Shopify's product importer matches rows by product handle and expects the bin in a specific metafield column. So you first reshape the Veeqo export into a Shopify-format CSV in a spreadsheet, then import that into Shopify.
Back up your current products first. Go to Products in your Shopify admin, select Export, and save the file. This gives you a restore point if anything goes wrong.
- Create the metafield definition in Shopify
Go to Settings → Custom data → Products. Add a metafield definition with namespace
my_fields, keybin_location, and type Single line text. If this definition already exists you can skip this step. - Build a Shopify-format CSV
Shopify's product importer matches rows by Handle, not by SKU. Create a new CSV with three columns:
Handle— the Shopify product handle for each product (you can find this in a Shopify product export).Title— the product title (required by the importer).Bin location (product.metafields.my_fields.bin_location)— the bin code from the Veeqolocationcolumn.
To build this file, match each Veeqo
sku_codeto its Shopify product handle. The simplest way is to export your products from Shopify (Products → Export), use the SKU column to match rows between the Shopify export and your Veeqo export, and copy the Veeqolocationvalue into the metafield column. - Import the CSV into Shopify
Go to Products → Import, upload your new CSV, and tick Overwrite existing products. Review the preview and select Import.
- Verify in Pickscan
Open Pickscan and check a product you updated. The bin location should now appear on the picking screen and on printed pick lists.
The Shopify importer can overwrite any product fields that are present in your CSV file. Make sure the Handle and Title values are correct — if a title is wrong in your file, it will overwrite the title in Shopify. Only include the columns you need.
For more detail on Shopify's CSV importer, see Using CSV files in the Shopify help centre.
Things to watch out for
- Bin column missing from the Veeqo export — you left the location dropdown on "All locations". In the Export variants dialog, set Stock levels to a single warehouse location, then export again.
- SKUs must match — the SKU is the join key you use to line the two files up. If a product's SKU in Veeqo does not match its SKU in Shopify, you will not be able to match its bin to the right product.
- Match by handle, not SKU — Shopify imports by product Handle, so your final CSV must use the Shopify handle. Use the SKU only to look up the right handle when building the file.
- Product-level bins — Shopify's product importer writes the bin at the product level, so all variants of a product show the same bin location. If your variants sit on different racks, set the bin to the rack where that product is normally picked.
- This is a snapshot, not a sync — if you rearrange your warehouse, you need to export a fresh CSV from Veeqo and repeat the process.
- Metafield column header must be exact — the CSV column header must be exactly
Bin location (product.metafields.my_fields.bin_location). A typo will create a different metafield that Pickscan does not read.